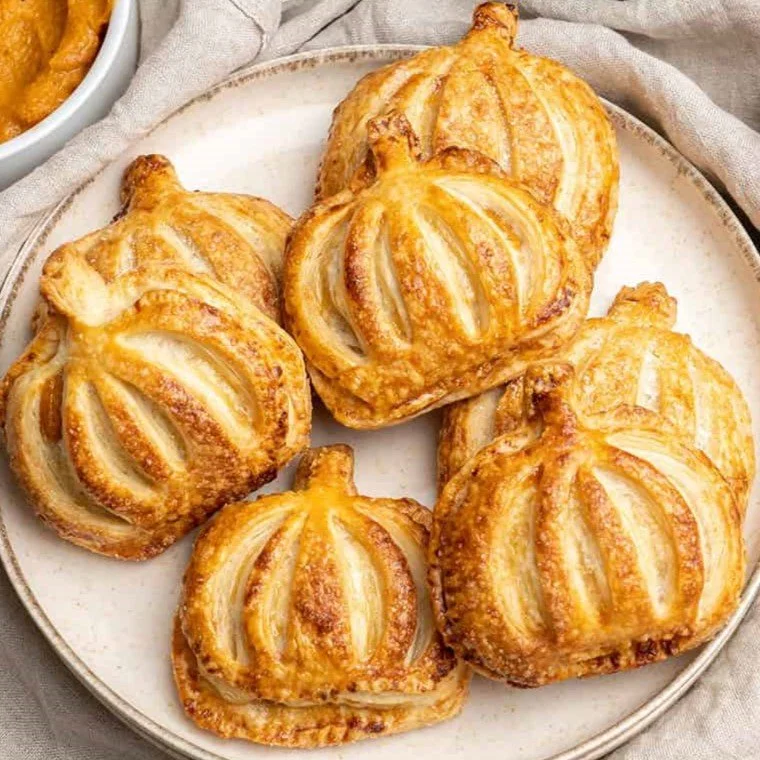
Pumpkin Hand Pies
Check our Events Calendar for your next cooking class!
You’re the Pumpkin To my Pie
Celebrate the start of pie season with these adorable pumpkin hand pies, packed with fall flavors. Easy to make and even easier to eat!
Pumpkin Hand Pies
Yield: 6 to 8 hand pies
1 package (two crusts) favorite premade pie crust dough, defrosted
1/2 cup Maple Pumpkin Butter (see recipe) or favorite pumpkin butter
1 large egg, beaten
1/2 teaspoon of water
1 pinch of salt
1/4 cup Demerara sugar or granulated sugar
Preheat the oven to 400°F. Place a rack on the middle shelf. In a small bowl whisk together egg, water, and salt. Line a rimmed baking sheet with parchment paper or silicone mat. Set all aside until needed.
Remove premade pie dough from the refrigerator and check for cracks and splitting. With a rolling pin, roll the pie dough back into 1 piece. Repeat with second pie dough. Cut out pumpkin shapes using a 3-inch pumpkin shaped or circle cookie cutter from each pie dough and place on the prepared baking sheets. Stack or laminate scraps on top of each other and roll to the same thickness. Cut out more pumpkins being careful to not overwork the dough. You should have 12 to 16 pumpkins/circles. Using a small knife, make four curved slits in half the crusts (6 to 8) to resemble the ridges of a pumpkin. Fill the other pumpkins with two teaspoons of the pumpkin butter being sure to leave a ⅓” border around the edge. Carefully place a a vented piece of dough over the pumpkin butter and lightly press the edges together. Brush the edges and tops of each pie with egg wash and crimp the sides together using a small fork. Sprinkle with demerara sugar or granulated sugar. Place in freezer for 10 minutes. Bake the pies for 15 -20 minutes, or until golden brown. Remove from the oven and cool for at least 5 minutes before removing to a cooling rack. Wait 5 minutes more before serving. Enjoy!
Chef Tip: Store leftover hand pies in an airtight container in the the refrigerator for 3-4 days. These can be frozen, too. Place unbaked pies on a baking sheet and freeze them. Once frozen, remove the hand pies and store them in an airtight container in the freezer for up to 2 months. When ready to enjoy, top with egg wash and sugar. Add an additional 8 to 10 minutes to your baking time.
Equipment Needed:
Assorted mixing spoons
Rimmed baking sheet with parchment or silicone mat
Fork
Paring knife
*A Small Favor for Big Flavors! “I’ve included links to a few of my favorite tools and ingredients from Amazon to help you along the way. If you use the links, I’ll earn a small commission—at no extra cost to you! It’s a sweet way to support my kitchen adventures, and I’ll keep bringing you more tasty recipes!" - Chef Stacy
🥧Upcoming Thanksgiving Pie Class!🥧 Excited to dive deeper into pie-making? Join our upcoming virtual, online cooking class on Wednesday, 11/6 from 5:30 pm to 6-ish.
Together we will make both a flaky pie dough and graham cracker crust. PLUS receive 7 recipes starring both!
Highlighted Tool of the Week
Get pie season started with this week's star: Mepple’s Rolling Pin with Thickness Rings.
“I love mine because the thickness rings keep my dough even without thin spots. I also use the measurements engraved on the pin as a ruler for my dough. It is great to not search for another tool with floured hands.” - Chef Stacy
Chef Stacy has worked for both Williams Sonoma and Sur La Table and has tried it all! She has handpicked a selection of top-rated cooking tools, all available on Amazon. Transform your kitchen into a chef’s paradise and take your culinary skills to the next level!
“These are items I use and love. If you make a purchase after clicking on the links, I’ll earn some grocery money which I promise to use to make even more recipe content. You do not pay a higher price. Thank you for your support!” - Chef Stacy


